
Smart Mirrors: A Comprehensive Guide to Easy Installation
Introduction
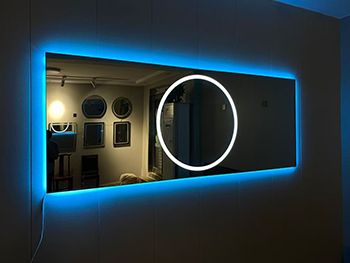
Smart mirrors are an innovative blend of technology and everyday utility, transforming ordinary mirrors into interactive displays. These mirrors can display the time, weather, news, fitness metrics, and even allow voice-controlled smart home integration. Installing a smart mirror may seem daunting, but with the right tools and a step-by-step guide, it can be a straightforward DIY project.
This guide will walk you through the entire process—from selecting the right components to assembling and configuring your smart mirror—ensuring a smooth installation experience.
---
1. Understanding Smart Mirrors
Before diving into installation, it’s essential to understand what a smart mirror is and how it works.
What is a Smart Mirror?
A smart mirror consists of:
- A two-way mirror (also called a one-way mirror) that reflects light while allowing a display behind it to be visible.
- A display screen (such as a monitor or TV) that shows information.
- A computer or microcontroller (like a Raspberry Pi or a small PC) to run the software.
- Optional sensors (e.g., motion detection, voice control).
Types of Smart Mirrors
- Basic Smart Mirror: Displays time, weather, and calendar.
- Voice-Controlled Mirror: Integrates with Alexa or Google Assistant.
- Fitness Smart Mirror: Tracks workouts and health metrics.
- Customizable Smart Mirror: Allows user-defined widgets and apps.
---
2. Choosing the Right Components
Essential Components
1. Two-Way Mirror Glass
- Must be larger than your display.
- Available in acrylic (lighter, cheaper) or glass (more durable).
2. Display Screen
- A computer monitor (preferably thin and energy-efficient).
- A TV (if you want a larger display).
- Ensure it has HDMI input for easy connectivity.
3. Mini Computer (Raspberry Pi or Alternative)
- Raspberry Pi 4 (recommended for beginners).
- Alternative: Intel NUC, old laptop, or Android-based solutions.
4. Power Supply & Cables
- HDMI cable for display connection.
- Micro-USB or USB-C power adapter for the Raspberry Pi.
5. Frame & Mounting Hardware
- Wooden or metal frame to encase the mirror and display.
- Screws, brackets, and adhesive strips for secure mounting.
Optional Components
- Motion Sensor (to turn the display on/off automatically).
- Voice Assistant Module (e.g., Amazon Echo Dot integration).
- LED Backlighting (for ambient lighting effects).
---
3. Step-by-Step Installation Guide
Step 1: Prepare the Frame
- Measure the dimensions of your display and mirror.
- Cut or purchase a frame slightly larger than the display.
- Sand and paint the frame if desired.
Step 2: Assemble the Display & Mirror
1. Place the display face-up on a flat surface.
2. Position the two-way mirror over the display (reflective side facing outward).
3. Secure the mirror to the frame using adhesive strips or brackets.
Step 3: Set Up the Raspberry Pi
1. Install the OS (Raspberry Pi OS or a smart mirror OS like MagicMirror²).
2. Connect the Pi to the display via HDMI.
3. Plug in the power supply.
Step 4: Install Smart Mirror Software
1. Download and install MagicMirror² (open-source smart mirror software).
```bash
bash -c "$(curl -sL https://raw.githubusercontent.com/MichMich/MagicMirror/master/installers/raspberry.sh)"
```
2. Configure modules (weather, calendar, news) in the `config.js` file.
Step 5: Mount the Smart Mirror
- Use wall brackets or a stand, depending on placement (bathroom, bedroom, hallway).
- Ensure cables are neatly tucked away.
Step 6: Power On & Test
- Turn on the Raspberry Pi and check if the display shows correctly.
- Adjust brightness and contrast for optimal visibility.
---
4. Troubleshooting Common Issues
Issue: Display Not Visible Through Mirror
- Solution: Increase screen brightness or adjust lighting conditions.
Issue: Raspberry Pi Not Booting
- Solution: Check power supply and SD card installation.
Issue: Wi-Fi Connectivity Problems
- Solution: Reconfigure network settings in Raspberry Pi OS.
---
5. Enhancing Your Smart Mirror
Adding Voice Control
- Integrate Amazon Alexa or Google Assistant using a microphone module.
Including Motion Sensors
- Use a PIR sensor to wake the display when someone approaches.
Customizing Widgets
- Modify the `config.js` file to add or remove modules.
---
Conclusion
Building a smart mirror is an exciting project that combines creativity and technology. By following this guide, you can install a fully functional smart mirror with minimal hassle. Whether you want a simple time-and-weather display or an advanced voice-controlled system, the possibilities are endless.
With the right components, patience, and attention to detail, your smart mirror will be up and running in no time—adding both style and functionality to your home.
Would you like recommendations for specific software configurations or advanced customization tips? Let me know!
Este sitio web utiliza cookies para garantizar que obtenga la mejor experiencia en nuestro sitio web.


 Teléfono
Comentario
(0)